The main way to present content in android mobile applications is RecyclerView. RecyclerView makes it easy to efficiently display large sets of data. Wide variety of applications are use RecyclerView: social network, app for reading books, or event Google Play app also uses RecyclerView with different items. In this article I will explain how to build complex feed with nested RecyclerView in 20 minutes using Groupie library.


Groupie is an android library which makes making complex RecyclerViews in your android app super easy. At the end of this article I will show you how to create such feed as shown below:
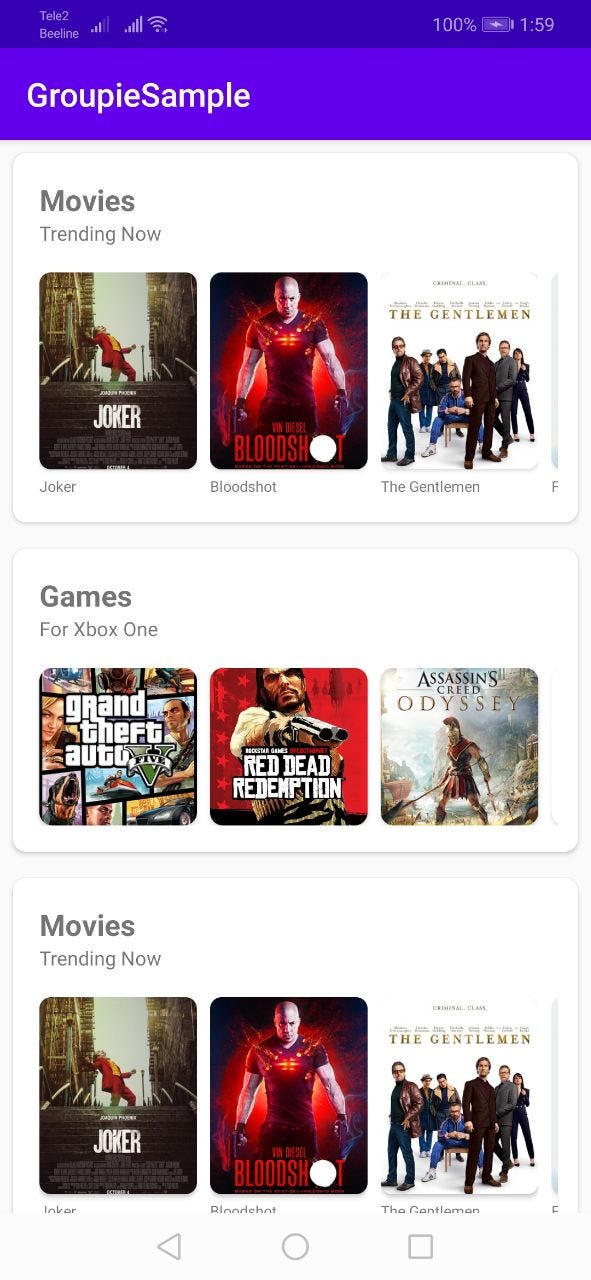
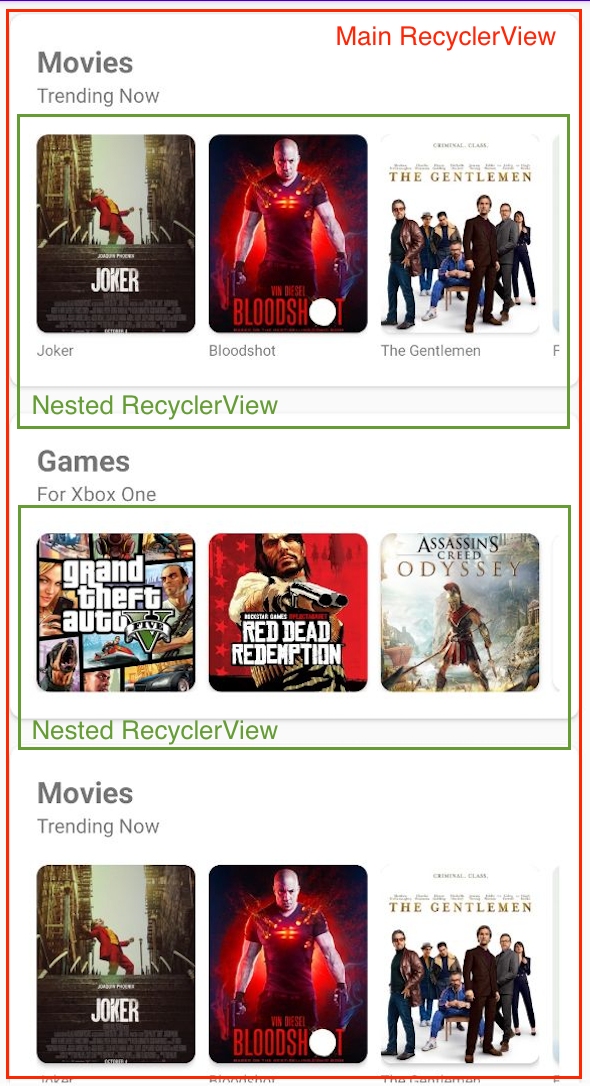
At this example we consider 2 RecyclerView. The main feed is RecyclerView and each item in this list has infinite items, so we will use nested RecyclerView for each row in this list, as shown below:
So, let’s do it using Groupie.
Groupie is a simple, flexible library for complex RecyclerView layouts.
Add Groupie to your project
First of all, let’s add Groupie to your android project.
- Add viewBinding to build.gradle into android section:
android {
...
   viewBinding {
       enabled true
   }
...
}
2. Add Groupie library into build.gradle like shown below:
| implementation 'com.github.lisawray.groupie:groupie:2.10.0' | |
| implementation "com.github.lisawray.groupie:groupie-viewbinding:2.10.0" | |
| implementation "androidx.recyclerview:recyclerview:1.1.0" | |
| implementation 'com.squareup.picasso:picasso:2.71828' | |
| implementation 'androidx.cardview:cardview:1.0.0' | |
| Press Sync Now and go to the next step. Create items for each cell in rowIn order to present content we need to create 3 types of cell
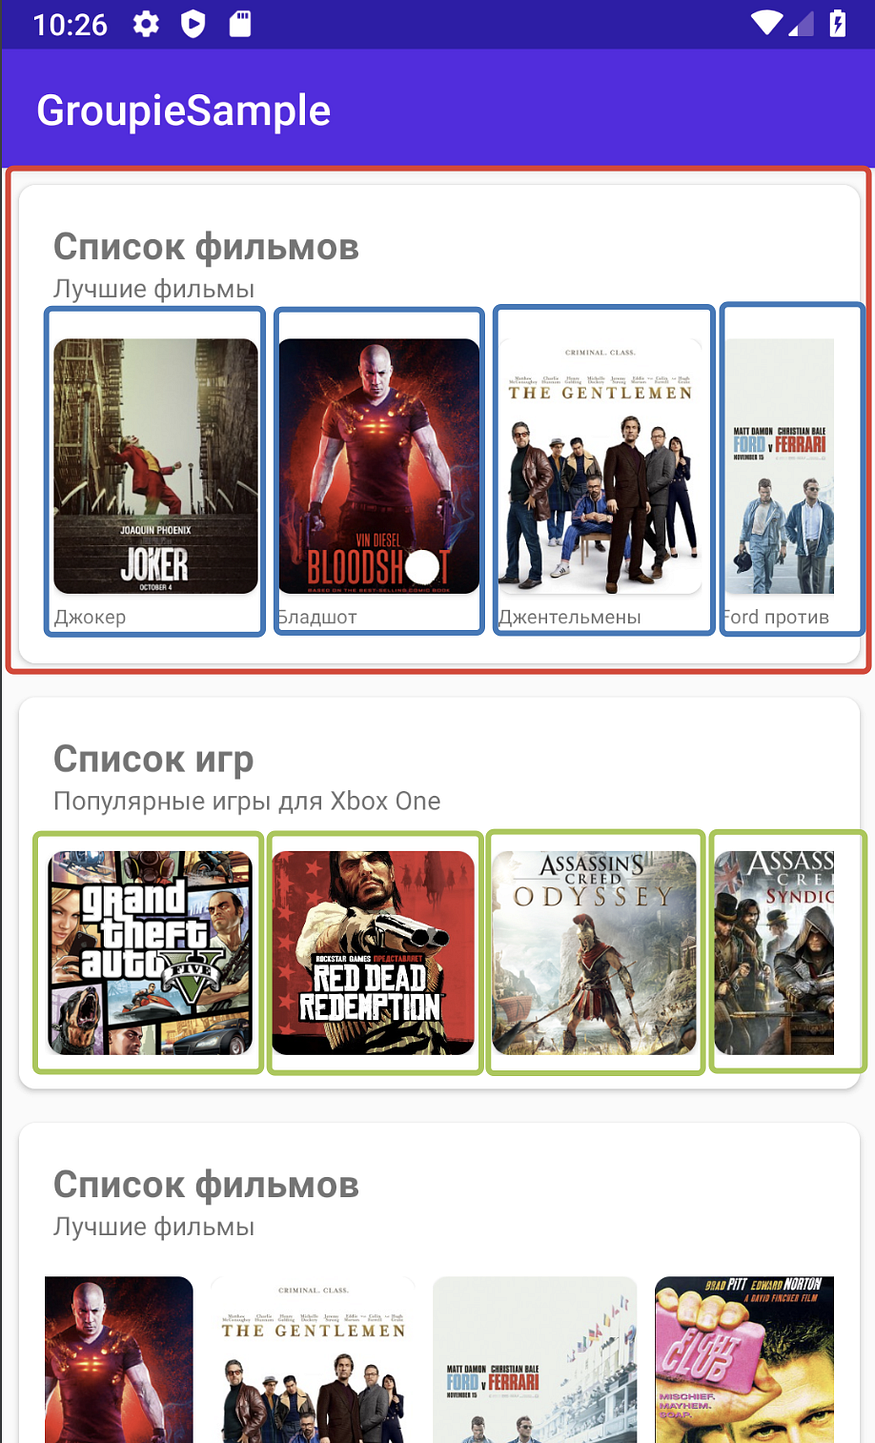 Creating a container cell with a nested RecyclerViewFirst, let’s create a shared cell with a nested RecyclerView to display smaller cells:  The layout of such a cell will consist of a CardView with a LinearLayout to display the title, description, and a RecyclerView to display the inner cells. |
Now let’s create the binding logic to display the cell data.
class MainCardContainer(
    private val title: String? = "",
    private val description: String? = "",
    private val onClick: (url: String) -> Unit,
    private val items: List>
) : BindableItem() {

    override fun getLayout() = R.layout.item_card

    override fun bind(binding: ItemCardBinding, position: Int) {
        binding.titleTextView.text = title
        binding.descriptionTextView.text = description
        binding.itemsContainer.adapter = GroupieAdapter().apply { addAll(items) }
    }

    override fun initializeViewBinding(view: View): ItemCardBinding {
        return ItemCardBinding.bind(view)
    }
}
Each cell, when using Groupie, must inherit from the abstract Item class. To do this, you need to override only 2 getLayout() and bind() methods. That is, to create a cell, you need to specify the layout that will be used to display the UI and add the data generation logic for this cell, and that’s it! There is no need to write adapters of the same type for different cells or to combine many different types of cells in one adapter, violating the principles of SOLID. With Groupie, for each cell, you need to create your own class, and describe the UI and logic in it!
In this example, we will use one base cell, which shows a name, description and a list of other Items. The most interesting thing here in this line:
That is, for a RecyclerView that is inside this cell, you need to add a common GroupAdapter and fill it with cells that are descendants of Item.
val adapter = GroupieAdapter().apply { addAll(movies) }The general container is ready, now it remains to lay out private cells for each content type. There will be 2 of them:
- Item for movie presentation.
- Square item in order to present games cover.
Item for movie.
The movie cell must also inherit from class Item and must implement 3 methods:
 class MovieItem(private val content: MovieContent) : BindableItem() {

    override fun getLayout() = R.layout.item_with_text

    override fun bind(binding: ItemWithTextBinding, position: Int) {
        binding.description.text = content.title
        Picasso.get()
            .load(content.url)
            .into(binding.imagePreview)
    }

    override fun initializeViewBinding(view: View): ItemWithTextBinding {
        return ItemWithTextBinding.bind(view)
    }
}
The layout is quite simple and the code can be viewed in the project on GitHub.
Square item for game cover.
This cell is also quite simple, so take a look at the project code.
 class SquareItem(private val content: Content) : BindableItem() {

    override fun getLayout() = R.layout.item_square

    override fun bind(viewHolder: ItemSquareBinding, position: Int) {
        Picasso.get()
            .load(content.url)
            .into(viewHolder.preview)
    }

    override fun initializeViewBinding(view: View): ItemSquareBinding {
        return ItemSquareBinding.bind(view)
    }
}
Connecting all cells together.
To create a feed, we need to create cells with content and pass them to the RecyclerView adapter. To create cells, 2 methods getPopularMovies() and getPopularGames() were created that return cells of the Item type.
private fun getPopularMovies(): BindableItem {
        return MainCardContainer(
            "Movies", "Trending Now", ::onItemClick,
            listOf(
                MovieItem(
                    MovieContent(
                        "Joker",
                        "https://upload.wikimedia.org/wikipedia/en/e/e1/Joker_%282019_film%29_poster.jpg"
                    )
                ),
                MovieItem(
                    MovieContent(
                        "Bloodshot",
                        "https://upload.wikimedia.org/wikipedia/en/4/45/Bloodshot_-_official_film_poster.jpeg"
                    )
                ),
                MovieItem(
                    MovieContent(
                        "The Gentlemen",
                        "https://upload.wikimedia.org/wikipedia/en/0/06/The_Gentlemen_poster.jpg"
                    )
                ),
                MovieItem(
                    MovieContent(
                        "Ford v Ferrari",
                        "https://upload.wikimedia.org/wikipedia/en/a/a4/Ford_v._Ferrari_%282019_film_poster%29.png"
                    )
                ),
                MovieItem(
                    MovieContent(
                        "Fight Club",
                        "https://upload.wikimedia.org/wikipedia/ru/8/8a/Fight_club.jpg"
                    )
                )
            )
        )
    }
The last lines just uses a GroupieAdapter to which we can pass any cells that are descendants of BindableItem.
val adapter = GroupieAdapter().apply { addAll(movies) }
binding.itemsContainer.layoutManager = LinearLayoutManager(this)
binding.itemsContainer.adapter = adapterSo, we have created a complex recycler view with just some lines of code and not to mention without making adapters, viewholders, etc. In just 20 minutes, we created a complex list for displaying various types of content with a nested horizontal list! Compare this approach with the traditional one and draw your own conclusions! Absolutely, this approach will save you time on developing such UI components and get rid of a bunch of useless code.


0 Comments